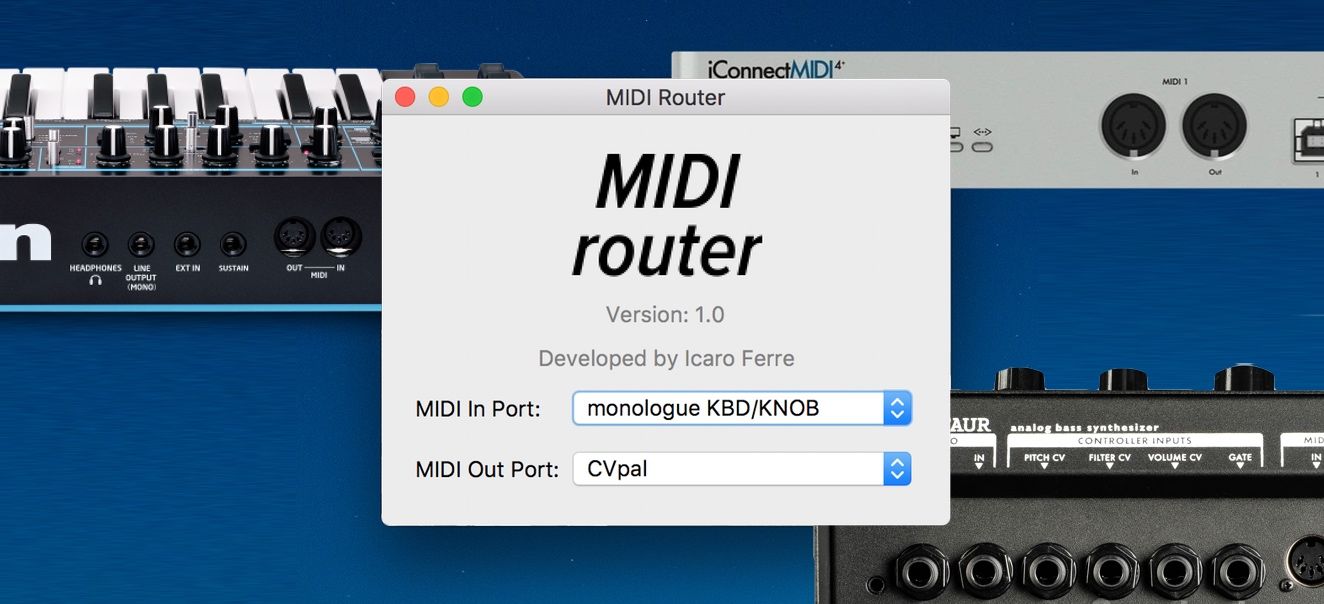
Midirouter Is A Simple App For Routing Midi For Mac
Make Free Midi Ringtones 1.01. Make Hard Link 1.0 Beta. Make Help 1.2. Make Link 8.12. Make Lips Appear Fuller Ebook 1.0. Make List Files 2.0. Make Millions with TV Infomercials 1.0. Make Money On eBay The Simple Way 1.0. Make Money Online 1.0. Make Multiple Replacements In Files Software 7.0. Make My Day 1.0. Make SFX 2.7.17.57. Midimittr is a simple utility to deliver the experience of low-latency MIDI over Bluetooth LE/USB to iOS Music apps that support MIDI. To achieve this, midimittr is routing the virtual ports of supported applications to Bluetooth and/or the USB Ports. If your favourite application is working with MIDI, it will most likely work with midimittr.
The desktop trial versions are fully functional MIDI Guitar for iOS is a simple but surprisingly effective app implementation of Jam Origin's technology. Except for occasional interruptions to the MIDI and VST/AU operation.
This post is for people who are trying to get their iPhone or iPad apps to connect to their hardware synthesizers or controllers via Wi-Fi. For instance, if you're using one of my synth patch editing apps, or trying to play a synth app on your iPad with a MIDI keyboard, then this is what you want. If you're using an iPhone, or if you don't have a way to connect a MIDI interface directly to your iPad (e.g. The Camera Connection Kit), then this approach is the easiest way to get things going without buying anything (assuming you have a computer with a MIDI interface!). I connect my to my synths this way, to edit sounds on them. For playing or sequencing (where the timing of MIDI matters), a Wi-Fi setup can be less reliable to use, just FYI!
This setup process can be slightly confusing without some instruction, as there are multiple parts to the setup, but once you get it right, it's an easy way to work. In this article, everywhere that I say 'iPad' it could also mean 'iPhone', everywhere I say 'desktop' could just as easily be 'laptop', and everywhere I say 'synth' I mean a hardware synthesizer, or MIDI controller (basically any machine that talks MIDI). There are some differences between Mac and Windows here, but I'll cover that as well! So, what is the basic idea going on here? You're trying to get MIDI data (which is basically just a big stream of numbers) to go from your iPad, over Wi-FI, to your desktop, and then your desktop in turn forwards that data on to your synth. You also want the reverse happening, where your synth can send MIDI data back to your iPad via your desktop and Wi-Fi connection. This way, you have two-way communication going on between your synth and your iPad.
Wireless MIDI Between Your iPad and Desktop This is the first and main part of the setup. Both your iPad and Desktop need to be connected to the same Wi-Fi network, so they can talk to each other. Some articles will recommend setting up an Ad-Hoc network to do this, but I'm going to go the simpler route here, where I assume you already have an existing Wi-Fi network. If you want to set up an Ad-Hoc network though, just do a quick search and you'll find a tutorial. Real quick: Ad-Hoc network upsides:. They're a substitute if you don't have an existing Wi-Fi network to connect to.
Or, if you want the fastest communication over Wi-Fi. If you're trying to play music rather than just edit synth patches) The downsides:. It's a little more of a pain to set up. It seems more prone to dropping connections. Your desktop and iPad can't also be connected to another Wi-Fi network at the same time, which means no googling or what-have-you while the Ad-Hoc network is going. I don't know about you, but I do a lot of googling. Whichever you choose, the first step is just to make sure that your iPad and desktop are both connected to the same network.
Midirouter Is A Simple App For Routing Midi For Machine
The next part is slightly different for Mac vs. For Mac On a Mac, you open the 'Audio MIDI Setup' program (it's built-in on OS X, in the 'Utilities' folder of 'Applications'). You'll want to be able to see the MIDI window, so select the 'Window' menu and choose 'Show MIDI Window' if you don't already see it. It will look something like this.
The 'Directory' on the left is a list of devices that can connect with wireless MIDI. If you don't see your iPad there, then make sure you have an app running that uses MIDI on your iPad! It won't show up until that's the case. Once you see your iPad in that list, click on it, then click the 'Connect' button. Voila, you should now be connected. I leave that 'Who may connect to me' dropdown set to 'Anyone' because it makes things easiest, but if you're concerned about security (rogue MIDI devices connecting to you!
Does that happen?), then you can select something more private. Depending on the iPad app you're using, you might need to do some setup there as well, to make sure your iPad is sending and receiving MIDI data to the network. My apps just automatically connect to whatever device is available, so no further setup is needed. Also, you can initiate the wireless MIDI connection from the app, if that's supported (mine do). The catch there is that you.will.
need to make sure the 'Who may connect to me' is set to 'Anyone' in that case. On Windows On Windows this process is very similar to the one on OS X, with one big exception: Wireless MIDI isn't built into Windows like it is on OS X. Instead, you'll need a driver called. That site has instructions on how to install it.
Once installed, the steps to connect are very similar to the ones I've outlined above, as the rtpMIDI interface was designed to look like the OS X interface. Making Your Desktop Forward MIDI Data to Your Synth At this point in the process, your iPad can send and receive MIDI data from your desktop. The other part of the process is setting up your desktop to automatically send that MIDI data on to your synth (as well as send MIDI data it gets from your synth on to your iPad via Wi-Fi). There are (at least) two approaches here, both of which I'll outline. Live Routings: Simpler, but Sometimes Broken The first approach is to use 'Live Routings' which is built into the wireless MIDI setup. The idea with Live Routings is that it takes any MIDI data received from your network MIDI connection and automatically passes it on to the MIDI interface of your choosing (e.g.
The MIDI interface your synth is connected to). This is exactly what we want! The catch is that sometimes Live Routings does not pass on some of the data! It seems to be some sort of bug with certain types of sysex data not being sent. So, bottom line, you can try this approach first, but if your app isn't working, this might be the reason! To set it up, just use the dropdown menus in the bottom-right corner of the network MIDI interface (see the picture above).
In both of those menus, choose the MIDI interface that your synth is connected to. The top dropdown specifies the MIDI connection that Live Routings will pass all data from (passing it on to the network MIDI connection). The bottom dropdown picks the MIDI connection to forward all network MIDI data to (from the network connection).
That might be a little confusing. Basically, you probably want to pick the same MIDI interface on both of those dropdowns, to establish a full two-way communication between your iPad and your synth! Better Live Routings! The other approach is using a small (free) app I've made which I call (it's hosted on Github). It basically does exactly what Live Routings does, but without the bugs! To use it, you'll have to install Max, which you can download for free from (it's free to run apps/patches, but costs if you want to make your own).
I say this approach is more complicated just because you have to install Max to use it, and you need to make sure that Better Live Routings is running when you're using your wireless MIDI connection. But really, it's pretty easy. Once you have Max installed, and have downloaded Better Live Routings, you open Better Live Routings, and it will look like this. In the top two dropdowns, select your MIDI interface on your desktop, and then your wireless MIDI connection (which is named 'Network Session 1' by default). In the bottom two dropdowns, select the same two things but in reverse order.
Here, you're doing the same thing as you do in Live Routings: telling the program where to pass MIDI data to and from, to establish a two-way connection. The circles on the right are to show you when MIDI data is being sent, so if you set it up like I have above, the top circle will light up when ever your synth sends MIDI data to your iPad, and the bottom will light up whenever there's MIDI data going from your iPad to your synth. This can be helpful when things don't seem to be working right. The other piece to note here is that if you're using Better Live Routings, then make sure that the 'Live Routings' dropdowns in your network MIDI setup (again, see the photo above from OS X) are set to be blank (just as they are in the picture)!
If not, then you're sending MIDI data twice every time it shows up, which is no good. That Should Do It At this point, you should be done!
You now have full two-way MIDI communication between your iPad and your synth, over Wi-Fi. Like I said, this stuff can be confusing. I'm thinking about making more software to help ease the pain of some of this.
But until then, please ask any questions you have in the comments, or on Twitter.
I'm fairly puzzled by this: In Logic 8, when creating a new track it lets me specify: audio software instrument external MIDI Fine for audio files, plugin software instruments and physical external MIDI devices (presumably via USB), but what about non-hosted plugins that are standalone? I've been trying to get the standalone G-Player tool to work (yes, I have the plugin version also, which works, but read on.) but the MIDI needs to go from Logic to G-Player via the the VSL performance tool-essentially just a MIDI router. G-Player can see the VSL perf tool and the perf tool has IN and OUT selectable (which appear sufficient), but how do you tell Logic to send a track's MIDI data outside of the application? I downloaded a 'MIDI patchbay' freeware app thinking maybe I needed another virtual router to tell Logic what to do, but this hasn't worked-there's nothing listed anywhere in any application or preference panel about MIDI data generated by Logic. I know this seems complicated, but I'm hoping maybe there's something simple I've overlooked (in Logic?) that someone might know. I'm fairly puzzled by this: In Logic 8, when creating a new track it lets me specify: audio software instrument external MIDI Fine for audio files, plugin software instruments and physical external MIDI devices (presumably via USB), but what about non-hosted plugins that are standalone? Those would be considered 'External MIDI'.
Logic doesn't make a difference whether your external MIDI instrument is hardware, software, on the same computer, on another computer, etc.: it's just 'external' (to Logic). Create an external MIDI track and choose its destination in the Library. If the destination you want is not available in the Library, you can use Audio MIDI Setup to create IAC busses and those will show up in the Library. You then use the same IAC bus as the MIDI source in your other app. Very helpful answer, thanks. But I haven't got it working and I can't seem to figure out why.
It.seems. like it should be totally working. Using the 'external MIDI' setting in Logic, I see 'tovsltool 1', 'tovsltool 2' etc and in the G-Player software instrument I see 'fromvsltool 1', etc but during playback I get no MIDI signal at all even after setting the VSL tool to 'thru'. I've successfully used the VSL tool on windows, but have never tried the Mac version (which looks identical actually). I never see the G-player app show up in any of the MIDI routing; anywhere. So I tried the new IAC bus approach, calling it 'G-Player' but it doesn't show up in Logic (even after restart) and I've tried launching the 3 apps in different order. (What's troubling is that while I can see 'tovsl' in Logic and 'fromvsl' in G-player, all I get in the VSL tool is 'IN' and 'OUT'.which may be all that's needed.but it ain't working.) Can't figure out why the signal is not getting through.or why I can't route Logic directly to G-player just to test.
So I can see Bus 1 showing up, and at one point I got some nasty loud clicks from g-player, but no playback.and logic seems to encounter a system overload on each pass.mostly randomly. (When I switch it to a different MIDI out the overloads stop.) I'll have to play around with this some more and figure out what's causing the overload. You've created a MIDI feedback loop. If you're sending MIDI out of Logic via the IAC bus, make sure you block it at Logic's physical input object by patching a cable to a 'dead end' object.a monitor object, for instance. Attachments dead end.png (48.76 KiB) Viewed 2043 times.
Thanks jordito and David-that definitely fixed the overload problem and I've managed to get sound coming out of g-player, so that's one battle won! However, no matter what I try I cannot seem to get any response from the VSL perf tool-either via the 'tovsltool' option or even using the Bus 1 (or combinations, which I tried). Something tells me there's a problem with the perf tool, not the MIDI setup. Very puzzling.
My only option is to contact VSL but they've already stated that they no longer offer support for this. A $6,000 library of which I can only use 3/5ths!
상세 컨텐츠
본문 제목
Creator express 8.5.3 for mac pro. Midirouter Is A Simple App For Routing Midi For Mac
본문
Midimittr is a simple utility to deliver the experience of low-latency MIDI over Bluetooth LE to CoreMIDI compatible iOS-Synths and applications as well as MIDI over USB. To achieve this, midimittr is routing the virtual ports of supported applications to Bluetooth and/or the USB Ports. If your favourite application was working with MIDI over WiFi in the past, it will most likely work with midimittr.Bluetooth over MIDI is supported in iOS 8+ and a feature of OS X Yosemite 10.10+.For more information please check out the support page.For MIDI over USB please download the tool from the support page.
Next time, install MidiPipe with 1-click. Learn how MacUpdate Desktop can install apps on MacUpdate with the simple click of the icon. Plus, keep all your apps updated.
Hardware systems for generating MIDI output from guitars are often expensive, impractical and unreliable. Jam Origin's revolutionary software alternative is none of these things. MIDI guitar: two words that give voice to the hope and despair of my age‑long quest to find a guitar‑led route to the world of synths and samplers. Along the route, some fine products have come my way, but none has quite cut the mustard. From the long list of the fallen, I have fond memories of the pioneering ARP Avatar and, in particular, of the Zeta Mirror 6 guitar, which combined fret‑scanning, capacitive touch‑sensing and pitch extraction to drive external MIDI synths with around 4ms latency via its companion Synthony rack unit.
Despite the disappointments, guitarists like me who wanted to record into our MIDI sequencers without wrestling with keyboards soldiered on, spending our hard‑earned cash with manufacturers who tried their best to cater to our needs. The early approach of pairing dedicated guitars with interfaces evolved fairly swiftly into the series of guitar‑neutral, one‑box systems with integrated MIDI converter and synthesizer, driven by proprietary hexaphonic pickups. The latest incarnation of this design from Roland dominates the sector today. Over the years, a number of small companies have developed specialist polyphonic guitar‑to‑MIDI converters, but they have typically been too expensive to have mass appeal, and all have seemingly fallen by the wayside. As a result, The desktop version of MIDI Guitar is the most configurable, thanks to the options on the Advanced setup page.
What we have been left with in terms of dedicated guitar‑to‑MIDI hardware are either monophonic pitch‑to‑MIDI converters or the spiritual successors of the Synthaxe — ie. Guitar‑shaped objects that can output MIDI. Now, however, the prodigious processing power of present‑day personal computers is coming to the rescue, by moving the focus of guitar‑to‑MIDI conversion away from specialist hardware and into the world of interfaces and software. Based in Aarhus, Denmark, and founded in 2009 by Ole Juul Kristensen, Jam Origin have developed a new, patent‑pending polyphonic pitch-prediction and detection system that can operate with ultra‑low latency. This unique technology is the basis for the company's first foray into MIDI guitar software, appropriately named MIDI Guitar. (You might recognise the iOS version of this software from last month's App Works column in which Bill Lacey poured praise on the iOS version of the MIDI Guitar family.
The app is also covered in this review to put it in context with versions for other platforms.) The actual patent application (Generative Audio Matching Game System, US 7 A1) makes very interesting reading, and sets out the methodology that lies behind the polyphonic pitch prediction and detection within MIDI Guitar. In extremely simple terms, it would seem that incoming audio from a source is compared against a stored library of pitches from that source, and the matches arising identify the pitches which are then translated to MIDI. As the title might suggest, the patent application also sets out the potential usage of the technology within a computer 'edutainment' game based around the concept of a jam session, and I'd certainly look forward to seeing that if it ever turns up in the real world.
Meanwhile, however, Jam Origin claim that MIDI Guitar is the world's first low‑latency, polyphonic software that can turn any guitar with a pickup into a polyphonic MIDI controller. What really sets MIDI Guitar apart from its competition is that there is no need for any specialised hardware: all you need is a way of recording the output from your guitar's pickup into your computer. MIDI Guitar runs on Windows (XP SP3 or newer), Mac OS (10.6 or newer) and iOS (iPad 2, iPhone 4S, iPod Touch 5 or newer).
Be sure that the HUD you are using is Mac Compatible. Usually, they will come downloaded in a compressed.zip,.rar,.7z or another compression file. You'll then need to extract the file by double-clicking the compressed file. /Library/Application Support/ Like, comment and subscribe for more TF2 vids! Animated hud for mac download. With the Record button off, click a slider handle in the HUD, then press Control-K. A keyframe for that parameter is added at the playhead position. Move the playhead forward to a new time. Change the same parameter slider. Move the playhead forward again. Change the same parameter slider again. Detailed setting is possible from the effects HUD Can roate, flip horizontal, flip vertical image Support for Animated GIF, and Animated PNG - Pause/play, move to previous/next frame, and can change frame rates from animated HUD Support for Slideshow You can adjust transparency for each window Can sharing image via SNS. Animated Screensavers Add some life and vigor to your computer screen while you're away (or watching) with these animated screensavers that, unlike slideshow screensavers, include moving elements, from analog clocks and wood burning fireplaces to 3D simulations and animated cartoons.
All variants are available as virtually unrestricted free trials, with the Windows and Mac versions being downloadable from the Jam Origin web site, whilst GarageBand (for Mac OS) and iOS variants are available on the Apple App Store. Installation under Windows and Mac is as simple as downloading and extracting the software, dragging the resulting folder into your Programs or Applications folder and manually copying the VST '.dll' files and the AU '.component' files to the necessary plug‑in folders. The desktop trial versions are fully functional MIDI Guitar for iOS is a simple but surprisingly effective app implementation of Jam Origin's technology. Except for occasional interruptions to the MIDI and VST/AU operation.
Installing and fully activating the iOS version of MIDI Guitar on my iPad 2 was as easy as I've grown to expect from the App Store. Opening the program brings up five information pages, three of which tell you all need to know about the app and how to run MIDI with other iPad apps and GarageBand. The other two pages show cable and Wi‑Fi MIDI connection graphics.
Cabled MIDI via an iOS MIDI interface linked to your computer, synth or sound module is recommended as the route with the least latency. However, as Macs have built-in Wi‑Fi MIDI support and there are third‑party apps for that purpose available on the Windows platform, MIDI over Wi‑Fi is an option if you want to avoid trailing wires; you can minimise the actual latency by running a network cable from your router to your computer. Being the simplest incarnation of MIDI Guitar, the iOS version also has the least degree of display and control. You can set polyphonic or monophonic mode, switch the latency between 6ms and 11ms and alter the input sensitivity to suit your guitar's output and your playing syle. A bargraph displays the input level, and you can route the MIDI output to the inbuilt Test Piano sound, to the Virtual MIDI Out or, via the Network Session 1 option, to Wi‑Fi MIDI. The GarageBand version is a step up in complexity from the iOS app, with the ability to select from any available input and output audio devices and channels. Sample rate can be varied from 44.1 to 96 kHz and buffer sizes between 128 samples (2.9ms latency) and 512 samples (11.6ms).
If you wish to run in stand‑alone mode, you can choose the output sounds from a range of built‑in pianos and synths, add additional software instruments via AU plug‑ins, add AU amps and effects and route the MIDI output as in the iOS app. A single button‑press configures the outputs for GarageBand, disabling the Instrument and Amp/Effects sections and routing the MIDI to GarageBand via the Virtual MIDI Out. A MIDI Pitch‑bend On/Off switch and Range control are added, as is an 'all notes off' Panic button. An Output Visualisation facility gives you a view of either the waveform of the input from the guitar or the Polytuner, in which the pitches of each of the recognised strings are displayed on a series of rotary dials. For those who might find such complexity distracting, these visualisations can be switched off.
A line of buttons across the bottom of the page illuminate to indicate the pitches being recognised, and can also be clicked on to generate the indicated pitches. The control complement is completed by level faders for a three‑channel mixer. As well as balancing the audio levels of the Instrument and Amp/Effects outputs, you can also adjust the gain of the MIDI velocity. The additional Plugins screen carries the Plugin Manager where you can add, remove and scan for AU plug‑ins on your computer.
In the Windows and Mac desktop versions, MIDI Guitar can run either as a stand‑alone application hosting VST or Audio Units instruments and effects, or as a plug‑in itself in VST or Audio Units format. As most guitarists probably would, I began by approaching MIDI Guitar as a virtual instrument, though Jam Origin suggest that we think of MIDI Guitar primarily as a DAW plug‑in. Either way, the desktop version is the most fully featured incarnation of MIDI Guitar. Its Essentials screen is almost identical to the GarageBand Basics screen except that the GarageBand default selector has disappeared and there is now an additional button that resets the program's Recognition preset (see below) to 'Electric Guitar Default'. Working on this screen is, other than that, the same as working on the GarageBand version. The Advanced screen is where you'll find the additional editing and setup facilities that, to me, give MIDI Guitar its real power.
If you're going to get the program to really work for you, this is where you'll be spending most of your time. In the Audio Device section, you'll see a drop‑down list of available MIDI Inputs, any or all of which can be routed in to merge with the guitar‑generated MIDI stream. This gives you not only the ability to use a floor controller to send MIDI controller information into MIDI Guitar via its Learn function, but also to use a keyboard to play the selected instrument in MIDI Guitar. There is no directly competing computer program that I know of.
Given the huge number of electric guitars in existence, MIDI Guitar's astounding price and performance, the low cost of good‑quality computer audio interfaces and the huge selection of DAW programs that are available, a new generation of guitarists (plus, eventually, other instrumentalists and — I would hope — even singers) can now incorporate MIDI‑based instruments, effects and other programs into their musical performances. I think that we could well be headed for some very interesting times. Before you get started with MIDI Guitar, you'll need to get your guitar tuned to concert pitch — or a maximum of one tone down, in the desktop versions — turn all controls to 11 and select the bridge pickup. Jam Origin are up‑front about stating that no real‑time audio tracking will ever be perfect, as there will always be some latency (zero latency would mean detecting a note before it is played!) and that accurate note triggering depends on the way that the guitar is played. I'd also advise making sure your strings are in good condition, slipping a thin strip of felt under the strings at the first fret to reduce any false triggering, and not using effects or playing through an amplifier. Jam Origin advise against using an acoustic guitar as the source, but I found that an under‑saddle pickup worked perfectly satisfactorily.
As an aside, selecting the computer's internal microphone and simply singing notes produced some interesting chordal structures, but perhaps that's just my singing. My sense is that any pitched source operating within the program's four‑octave range is going to give interesting results, some of which may be more useful than others. Jam Origin MIDI Guitar $100/$40/$20 $100/$40/$20 pros.
Patent‑pending, highly robust pitch extraction. Capable of extremely accurate tracking. Low latency at least equivalent to current hardware units. Extremely simple to set up and use. Given its inventor's enthusiasm, it's going to get better and better. An unbelievable price point for this level of performance.
Cons. If you don't have a suitable guitar‑to‑computer audio interface, you're going to want to buy one. Summary MIDI Guitar is an amazing program that opens up the world of MIDI to guitarists without needing proprietary hardware to deliver an astounding level of performance. It is able to run on PC or Mac not only as a stand‑alone host for VST and AU instruments and effects, but also as a VST and AU plug‑in. Together with its iOS implementation, MIDI Guitar opens up a whole new area of experimentation at a price point that is simply unchallengeable.
The future of MIDI Guitar starts here! All contents copyright © SOS Publications Group and/or its licensors, 1985-2018.
Midirouter Is A Simple App For Routing Midi For Mac Pro
All rights reserved. The contents of this article are subject to worldwide copyright protection and reproduction in whole or part, whether mechanical or electronic, is expressly forbidden without the prior written consent of the Publishers. Great care has been taken to ensure accuracy in the preparation of this article but neither Sound On Sound Limited nor the publishers can be held responsible for its contents. The views expressed are those of the contributors and not necessarily those of the publishers. Web site designed & maintained by PB Associates & SOS.