Set Work Hours In Outlook For Mac
Let’s be honest–not all of us keep to a 9-5 schedule, and you may want to change your working hours in your Outlook Calendar. The Office 365 Portal makes this easy! To do this, head to the Office 365 Portal, then select Outlook: Click on the Calendar symbol to go to the Outlook calendar: Select. Jan 25, 2019 When you create a meeting request and add a colleague, Outlook displays your working hours as 12 pm to 8 pm and any hours they don’t work in this period will show as a light gray bar. When they try to book a meeting with you, all of the hours up to 12 pm will similarly show as a light gray bar for them. You can also set your working days, so.
How frequently do you log in to your email account and check for new emails? For me it’s like every 5 minutes (right, I definitely plan to go and buy the ‘The Email Addict’s Guide to Life’ book after I am done with this post). And, since I use MS Outlook as my desktop email client, I have it set to sync with my accounts automatically every 5 minutes.
By default, the tool is set to send and receive emails every 30 minutes. If you do not prefer it that way, read on and learn how to change the settings.
Cool Tip: Are you a Windows Phone 8 user? Learn how to set up and manage email sync on your device.Steps to Change Send Receive Time Interval on MS Outlook
We are going to use MS Outlook 2013 for demonstration in this tutorial. The steps are more or less same on all the previous versions.
Step 1: Navigate to the backstage view by clicking on File.
Step 2: On the left pane of the backstage view, click on Options. That will open the Outlook Options modal window.
Step 3: You will see a menu aligned on the left. Click on Advanced.
Step 4: Scroll down, until you see the send and receive section on the right pane of the window.
Note: Checking Send immediately when connected means that when you are connected to the internet, the time interval rule won’t apply to messages you send out of your system. It will always be active to send.Step 5: Click on the Send/Receive button to launch Send/Receive Groups window. As an alternate you could skip all of the above and use Ctrl + Alt + S Can i stitch together video files on vlc for mac. to open this window directly.
Step 6: Select the group for which you wish to make the change. A group is defined by the set of accounts linked to it. All Account group exists by default and has all accounts in it. You can create your own groups and choose which accounts are a part of it.
First thing, Schedule an automatic send/receive every N minutes box must be checked. It has a version for offline settings as well and I hope you can make sense out of it.
Make the time interval changes as you see fit. How to use fatshark goggles with liftoff.
You must have noticed that I have Include this group in send/receive (F9) checked. That means, at any given time I can simply hit F9 and sync all the accounts ad-hoc (irrespective of the time interval). The UI options for same are shown in the image below.
Conclusion
If you not an MS Outlook user, you have a reason now. It makes the sync up process truly automatic and that too with user defined frequency. Besides, the desktop notifications act as wonderful interruptions to help you always stay on top of your emails.
Also See#outlook #How-to/GuidesDid You Know
You can use the Chrome search bar as a calculator.
More in Windows
8 Ways to Fix Windows Search Bar Is Missing Issue
Related articles:
Sending email has never been easier than it is in Outlook 2019. You’ll notice the familiar Ribbon interface, and you’ll still find all the Outlook features you’ve come to love — plus some new ones. Use this handy Cheat Sheet to discover great tips and keyboard shortcuts to help you get the most out of Outlook.
10 Tips for Using Outlook 2019’s Mail Module
- Adjust columns and panes. The columns in the Inbox and other mail locations are adjustable. To widen a column, position the mouse pointer between two column headings and drag to change the width of the one on the left. You can also adjust the relative sizes of the navigation pane, mail list, and reading panes; just position the mouse pointer over a divider between the panes and drag.
- Choose which columns appear. You can customize the columns that appear in your mail folders. On the View tab, click Add Columns to access the Show Columns dialog box, and add or remove columns from there.
- Open a message in its own window. Reading a message in the Reading pane is good sometimes, but other times you might want to see the message in a larger space. Double-click a message to open it in a new window, or select it and then on the View tab, click Open in New Window.
- Close all open items. Here’s a shortcut when you have a lot of different messages or other items open at once. To close them all in one swoop, on the View tab click Close All Items.
- Group messages by conversation. If there has been a lot of back-and-forth messages on a topic, you can easily see all the related messages at once. On the View tab, select the Show as Conversations check box and click This Folder. Then use the Conversations Settings button’s drop-down menu to fine-tune how the conversation threads appear.
- Access advanced viewing settings. There are more ways to adjust the Mail module’s view than you have probably imagined. To access them, from the View tab, open the Arrangement group’s gallery and choose View Settings on its menu. The Advanced View Settings dialog box opens. From here you can access columns, groups, sorting filtering, conditional formatting, and more.
- Select favorite folders. To make a folder shortcut appear in the Favorites area at the top of the navigation pane in the Mail module, drag-and-drop it there from the bottom portion of the navigation pane. You can also right-click a folder and choose Show in Favorites.
- Filter email. Have you ever tried to browse your Inbox looking for messages of a certain flag or category, or that have attachments? On the Home tab you can click Filter Email and then choose a criterion by which to quickly filter. For example, choosing Attachments shows only messages that contain attachments. You can also filter by typing a search word or phrase in the Search Current Mailbox box above the mail list.
- Respond to requests for delivery or read receipts. Some messages come with a request for an acknowledgement that you have received or read them. Some people find this useful; others think it’s intrusive or rude. You can set your preferences as to what will happen when you get such a request. Choose File, Options, click Mail, and scroll down to the Tracking section. In the For Any Message Received That Includes a Read Receipt Request section, choose your preference: Always send a read receipt, never send one, or ask each time.
- Use stationery. The Stationery feature in Outlook isn’t great for business, because it adds unnecessary graphics to the message and most business people consider it unprofessional. But for personal use it can add a fun, whimsical touch. Choose File, Options, and click Mail. Click Stationery & Fonts, and then set up your stationery in the Signatures and Stationery dialog box. Try clicking the Theme button to start out with a theme. After setting up your theme, when composing a new message, make sure that HTML is selected on the Format Text tab, because stationery works only with HTML-formatted messages.
10 Tips for Using Outlook 2019’s Calendar Module
- Change the default reminder sound. When a reminder appears, you hear a sound (if your sound is turned on, of course). By default, it’s a sound called reminder.wav that comes with Outlook. You can change to some other sound. Choose File, Options, click Advanced, and in the Reminders section, click the Browse button and select a different sound file.
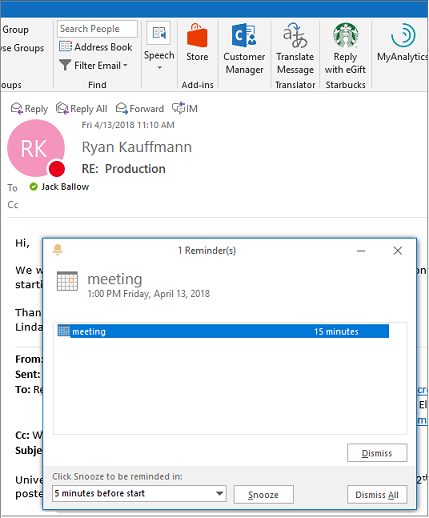
- Replay reminders. If you accidentally close the Reminders window, you can reopen it. On the View tab, in the Window group, click Reminders Window.
- Add holidays to the calendar. When is Easter next year? Thanksgiving? Outlook knows. But it won’t tell you unless you ask. Outlook doesn’t show holidays on calendars by default because they are locality-dependent. You can add them if you want them, though. Choose File, Options and click Calendar, and then in the Calendar Options section, click Add Holidays. Choose the country you are in and click OK.
- Make a copy of a calendar. To copy a calendar, on the Folder tab click the Copy Calendar button. Then choose the location for the copy. You might do this to start a new calendar that contains all the items of your main calendar as a starting point, and then add or remove items on it and share it with others.
- Work with multiple time zones. You can set up additional time zones and assign meaningful labels to them that can help you with scheduling. Choose File, Options, click Calendar, and in the Time Zones section, enter a label for your main time zone and choose the zone. You can select the Show a Second Time Zone and Show a Third Time Zone check boxes and label them, too.
- Change the calendar color. Each calendar uses a different color for its tab, headings, and items, so you can tell them apart if you are viewing more than one calendar at once. To change a calendar’s color, right-click its tab and then choose Color and select a color. You can also just display the calendar and then on the View tab, click the Color button.
- Adjust the time scale. In calendar views where you see individual times, like Day and Week, you can change the time scale to collapse or expand the calendar. On the View tab, click Time Scale and then choose an interval that each line on the calendar should represent.
- Set work hours. By default, Outlook considers “work hours” to be 9:00 a.m. to 6:00 p.m. Monday through Friday, and Sunday to be the first day of the week. You can change that to accommodate different shifts and schedules. Choose File, Options and click Calendar, and then change the settings in the Work time section.
- Show the weather or not. Have you noticed that Outlook shows you your local weather at the top of the calendar? If you don’t like that, you can turn it off. (You can also change it between Fahrenheit and Celsius.) Choose File, Options, click Calendar, and in the Weather section, mark or clear Show Weather on the Calendar and choose the temperature scale.
- Start Outlook in the Calendar. By default, Outlook starts up in the Inbox. To start up in the Calendar module instead, choose File, Options and click Advanced. In the Outlook Start and Exit section, click Browse and then click Calendar.
10 Tips for Using Outlook 2019’s People Module
- Specify the parts of a person’s name. When you create a new contact, whatever name you enter in the Full Name box is automatically parsed into separate fields for the Title, First, Middle, Last, and Suffix. Outlook doesn’t always do a perfect job of this. You can access a dialog box for entering each of those pieces of information by clicking the Full Name button as you are creating a new contact.
- Set the File As order. The File As setting for a contact determines its order in the alphabetical arrangement of contacts. By default it’s Last Name, First Name, but you can change that. For example, you might want a company to appear by the company name, not the last name of your contact there. Set the File As setting for an individual contact in its record by double-clicking it from the People app and then changing its File As setting in the window that appears.
- Design the business card layout. The default card design shown in Business Card view can be modified. Open a contact in its own window, and then on the Contact tab, click the Business Card button and then work in the Edit Business Card dialog box to modify the card design and the fields it includes.
- Use more fields. The fields that appear by default for a contact when you open it in its own window are just a subset of the available fields. To see more fields, open the contact and then on the Contact tab, click Details. Some of the additional fields include Nickname, Manager’s Name, Spouse/Partner, Birthday, and Anniversary.
- Start a new contact based on an existing one. If you have multiple contacts who all work for the same company, a lot of the fields will likely be the same for them, such as mailing address and web page address. To save time, you can start a new contact based on an existing one. Open the existing contact in its own window, and then on the Contact tab, click the lower portion of the Save & New button, so that a menu appears. From that menu, select Contact from the Same Company.
- Add non-text content to contact notes. Open a contact in its own window and then click in the Notes area. On the Insert tab you’ll find many choices for content you can insert in the Notes area, including pictures, shapes, icon, charts, SmartArt, equations, symbols, and WordArt.
- Mark a contact as private. Perhaps you have some contacts on your Contacts list you would rather not share. To exclude a particular contact from being shared, open the contact in its own window, and on the Contact tab, click Private.
- View someone else’s shared contacts. You can share your contacts with the Home tab’s Share Contacts button. To view someone else’s shared contacts, click the Open Shared Contacts button (on the Home tab) and then click the Name button and select the person whose contacts you want to see. If that person has shared their Contacts folder, you’ll be able to browse it (minus any they have marked as Private). Obviously, this works best in a business environment where everyone is on the same mail or SharePoint server.
- Check for duplicate contacts. Wouldn’t it be nice if Outlook would tell you if you try to create a new contact for someone who is already on your list? You can make that happen. Choose File, Options, and click People. In the Names and Filing section, select the Check for Duplicates When Saving New Contacts check box.
- Create a new view. On the Home tab, open the Current View gallery and choose Manage Views. From there you can create your own custom view. Start by selecting an existing view and clicking Copy. Then select the copy and click Modify. Your new view will appear in the current View gallery alongside standard views like Business Card, Phone, and List.
5 Tips for Using Outlook 2019’s Notes Module
- Change note colors. Sticky notes don’t have to be yellow. To change a note color, change its category. Select it, and then on the Home tab, click Categorize and choose a different color. This changes the note color in Icon view and any other views that show it as a colored sticky note.
- Forward a note. To send a note to someone else via email, select the note and on the Home tab, click Forward. Then address and send the email as you normally would. If the recipient has Outlook, he or she can open and view the note.
- Sort and filter the current Notes view. To change the way notes appear, you can modify the view, the same as in other modules. On the Home tab, open the Current View group’s gallery and choose Manage Views. Select Current View Settings, and then click Modify. Click Sort to change the sort order, or Filter to filter the list. Click Reset Current View if you change your mind about the changes.
- Make the notes larger or smaller. When viewing the notes in Icon view, on the View tab, click Large Icons or Small Icons to switch between the two options. (But be warned: You are not going to like Small Icons view. It’s messy, and you lose the icon colors.) List view, also available from the View tab, shows the notes as a single-column list.
- Resize an open note. When you double-click a note, it opens in its own separate sticky-note window. You can drag the corner of this window to change its size so you can see more of the note without scrolling (if it’s a long note).
3 Tips for Managing Your Outlook 2019 Data Files
- Archive old information. Data files can quickly grow to gigabytes in size. Over time, a large data file can become unwieldy, causing Outlook to be slower to start up and shut down. You might want to archive old messages and items into a separate file that you can access as needed. To archive files, click File and then click the Tools button. Click Clean Up Old Items. Select which folder(s) to archive, and then set a date threshold in the Archive Items Older Than box. Choose an archive file location, or accept the default (which is the same location as your main Outlook data file, but named Archive).
- Clean up your mailbox. Mailbox Cleanup is more advanced and involved than a simple archive operation. With Mailbox Cleanup you can find items that are older than a certain number of days or larger than a certain number of kilobytes. You can use AutoArchive to automate the archive process, and you can empty the Deleted Items folder. To get started, click File, click Tools, and click Mailbox Cleanup.
- Share Outlook with other users. When you share a computer and each person has his or her own Windows sign-in, you don’t have to worry about Outlook crossover; when each of you runs Outlook, you get your own private mailbox and data file. But if two or more people share the same sign-in, they don’t necessarily have to share a single Outlook data set. The key to privacy in this case is to create additional profiles in Outlook. Click File, click Account Settings, and click Manage Profiles. Create a new profile in the Mail dialog box by clicking Add and filling in the requested information. Then in the Mail dialog box you can choose Prompt for a Profile to Be Used if you want Outlook to ask which user to load each time it opens. Alternatively, you can choose Always Use This Profile and then select the one to use. To switch profiles if you haven’t asked Outlook to prompt you at startup, choose File, Account Settings, Change Profile. Outlook will restart and ask which profile to load.
Outlook 2019’s Keyboard Shortcuts
You can accomplish some tasks a lot faster by using keyboard shortcuts. The following tables offer some handy shortcuts to help you be more efficient.
| This Shortcut | Creates One of These |
| Ctrl+Shift+A | Appointment |
| Ctrl+Shift+C | Contact |
| Ctrl+Shift+L | Distribution list |
| Ctrl+Shift+E | Folder |
| Ctrl+Shift+M | Email message |
| Ctrl+Shift+N | Note |
| Ctrl+Shift+K | Task |
| Ctrl+Shift+Q | Meeting request |
| This Shortcut | Switches To |
| Ctrl+1 | |
| Ctrl+2 | Calendar |
| Ctrl+3 | Contacts |
| Ctrl+4 | Tasks |
| Ctrl+5 | Notes |
| Ctrl+6 | Folder list |
| Ctrl+7 | Shortcuts |
| Ctrl+8 | Journal |
| This Shortcut | Helps You Do This |
| Ctrl+S or Shift+F12 | Save |
| Alt+S | Save and close; Send |
| F12 | Save As |
| Ctrl+Z | Undo |
| Ctrl+D | Delete |
| Ctrl+P | |
| F7 | Check spelling |
| Ctrl+Shift+V | Move to folder |
| Ins | Mark complete |
| Ctrl+F | Forward |